Allow me to set the scene. Your party has been tasked with eliminating the Orc threat stemming from a local dungeon. In besting a dozen of the brutes, your party has taken some damage and the wizard has expended both of his healing spells. You open a door (or rather Zargon opens a door at your request) to find a small chamber, empty save for a cluttered desk sitting against the far wall. Upon this mysterious desk you find a flask of liquid. What else WOULD you do but instantly quaff this unknown liquid? (The European version at least specifies that you recognize the liquid, but Americans were just going around drinking everything!)


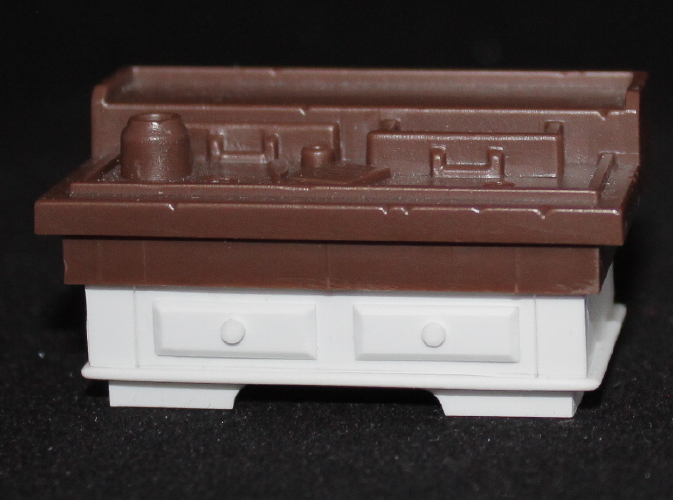
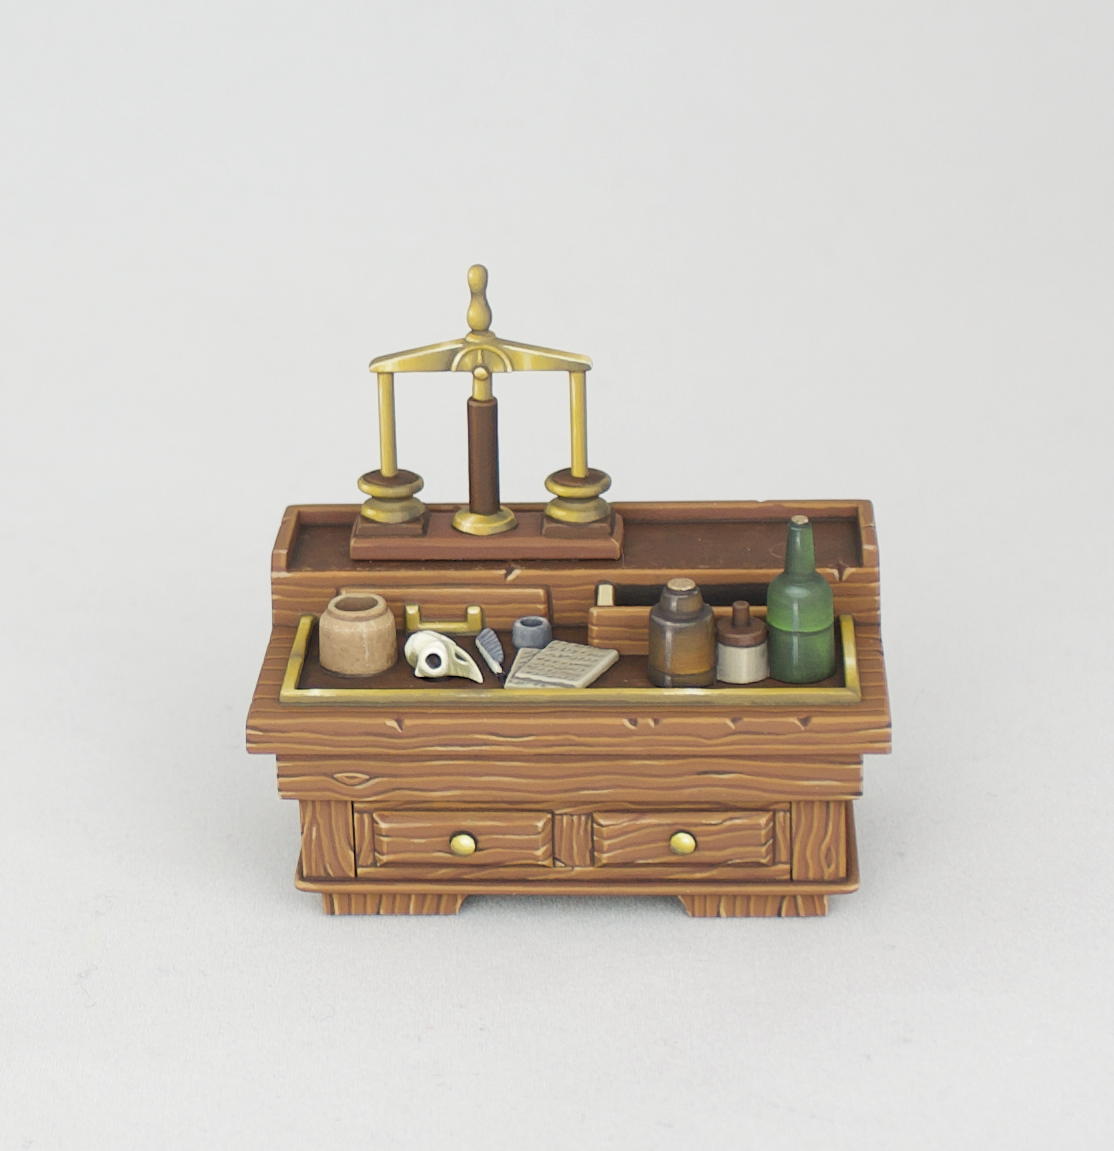
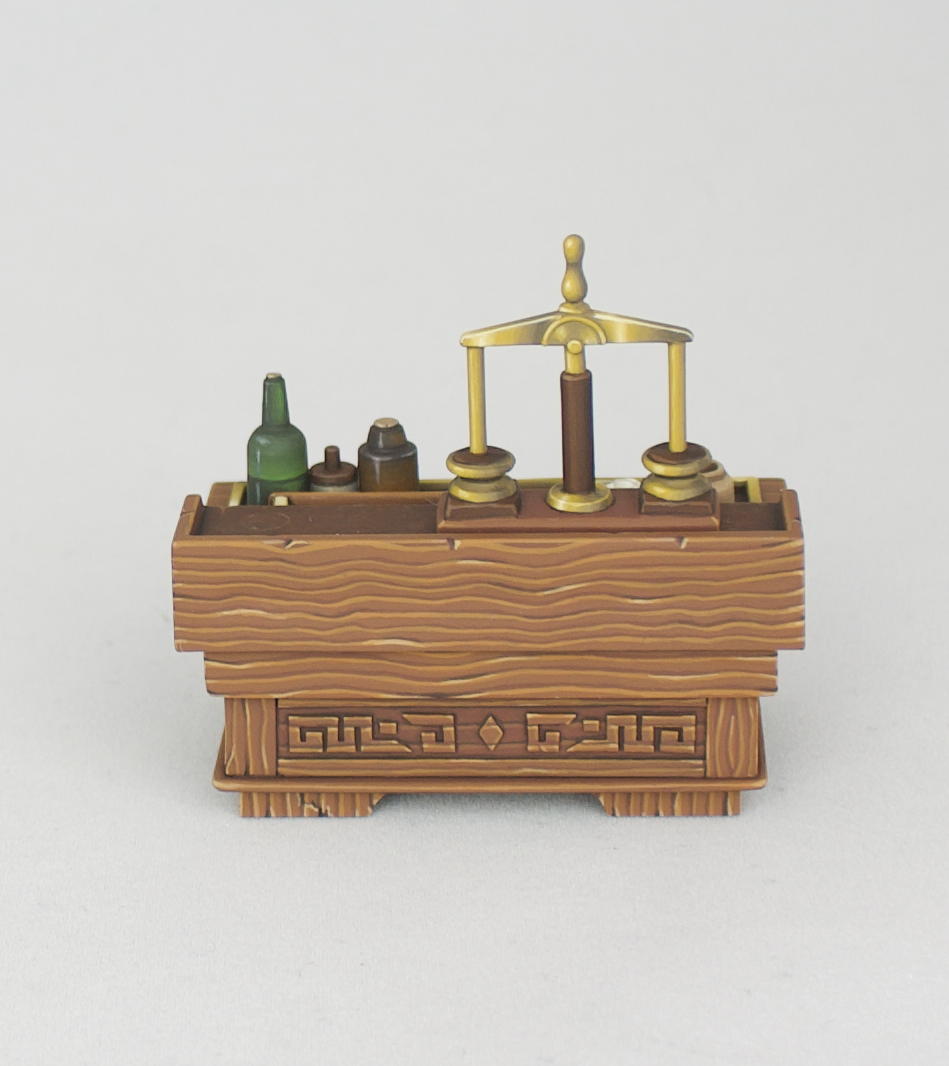
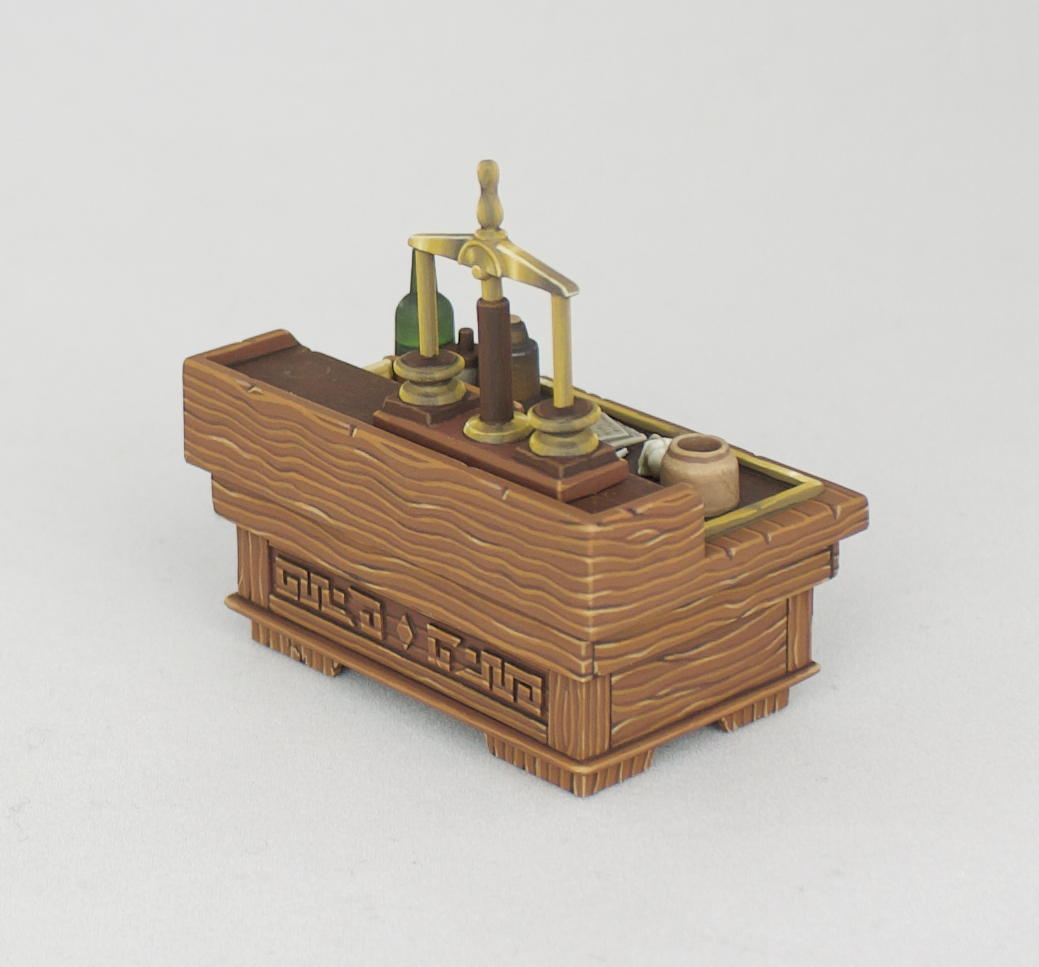
Of all the pieces of furniture found in the dungeons of HeroQuest, the Alchemist’s Bench has to be the most exciting one to stumble across. While everyone loves the ambiance of the Torture Rack, it doesn’t do anything other than block your path. Sure, a Treasure Chest may hold a horde of gold or a powerful artifact, but just as often they contain a poison needle or are positioned behind a pit trap. Rarely is the Alchemist’s Bench trapped, and often it holds a gem in one of its drawers or a potion in one of its bottles.

As with the Cabinet and the Tomb, the first step in upgrading the Alchemist’s Bench was to replace the original cardboard insert with a scratchbuilt plastic component. This was rather straightforward except for the decorative runes cut into the back, which required some fiddly spacing and piecing together of small bits. In place of the stock skull (which is awfully chunky and lacking in detail), I selected a suitable replacement from the Citadel Skulls Box previously referenced. The human skulls were a bit on the small side, and I had used an Orc skull for the Torture Rack previously, so I chose a bird skull for this piece. Alchemists must be well educated, and it seems bird skulls are often used as set decoration in the chambers of wizards and scholars.


Painting was also straightforward, if slightly mind-numbing. Having done woodgrain and non-metallic metal on so many subjects before, those portions were completed without much excitement. Glass, on the other hand, was a new undertaking for me. How does one paint a solid object to appear as though it were clear? After scouring online tutorials and reference photos, I gave it a try… and failed to achieve convincing transparency. Luckily, many old bottles appear frosted or barely translucent, so they still work decently well for a Fantasy piece. But this is definitely an area in which improvement can be made.


One more piece of furniture complete, one step closer to finishing the core box of HeroQuest. Next I have set my eyes on the Sorcerer’s Table… which means marble. Lots and lots of marble. If I make it through that ordeal, then all that is left is the Gargoyle and the second bookcase (which will be reimagined in a special way). Stay tuned!
Stained Wood:
The areas of stained wood were base coated with VMC Mahogany Brown (70.846), which also served as the majority of darker grain lines. A layer of a 1:1 mix of Mahogany Brown and VMC Orange Brown (70.981) was applied for the major striations, followed by a thinner line of pure Orange Brown as a highlight along the top of each major striation. Grain lines were darkened in areas with a 2:1 mix of Mahogany Brown and VMC Black (70.950), and the highlight was lightened in some areas with the addition of VMC Dark Sand (70.847) to the Orange Brown.
Natural Wood:
The unstained wood for the sides of the open drawer were base coated with a 1:1 mix of VMC Orange Brown (70.981) and VMC Dark Sand (70.847). The major striations of the grain were then painted with pure Dark Sand. Highlights along the corners were applied with the addition of some VMC Ivory (70.918) to the Dark Sand.
Leather Blotter:
The leather desk pad was base coated with VMC Flat Brown (70.984). The borders were then darkened with a wash of Flat Brown mixed with VMC Black (70.950). Lighter areas were applied with the addition of some VGC Parasite Brown (72.042) to the Flat Brown, and even lighter with a splash of VGC Bonewhite (72.024) added to the mix in fine, linear streaks. The different colors were then muted with glazes of the original Flat Brown.
Earthenware Jar:
A base coat of VMC Cork Brown (70.843) was applied to the entire jar. A shade tone was created with the addition of some VMC Flat Brown (70.984), which was applied under the lip of the jar, along the inside surfaces, and stippled around the outside. A highlight tone was applied with a 1:1 mix of Cork Brown and VMC Ivory (70.918). Areas with too much contrast were blended back down with glazes of Cork Brown.
The liquid in the jar was base coated with VMC Park Green Flat (70.969), lightened with VGC Escorpena Green (72.032), and then stippled with Escorpena Green mixed 1:1 with VMC Deck Tan (70.986).
Bottles:
The brown bottle was coated with VMA Dark Brown (71.042). A 1:1 mix was made with Dark Brown and VGC Beasty Brown (72.043), which was applied from the bottom quarter (the waterline) to the top quarter, blending softly into the Dark Brown at the top. The same process was repeated with pure Beauty Brown, starting at the waterline and blending into the previous layer about halfway up the bottle. A thin line of Beasty Brown mixed 1:1 with VGC Scrofulous Brown was added in the lightest areas directly above the waterline. The original Dark Brown/Beasty Brown mix was also applied below the waterline to create a sense of translucency to the liquid. Reflective highlights were added first with a 2:1 mix of Dark Brown and VMC Ivory (70.918), followed by specular highlights with a 1:2 mix of the same colors.
A similar process was followed with the green bottle using VMC Black (70.950), VMC Ivory (70.918), and VGC Goblin Green (72.030).
The small ceramic jar was base coated with VMC Medium Grey (70.987), shaded with the addition of some VMC German Camo Black Brown (70.822), and highlighted with the addition of some VMC Ivory (70.918). The lid was then base coated with VMC Flat Brown (70.984), shaded with the addition of German Camo Black Brown, and highlighted with the addition of Medium Grey.
Bone:
The bone areas we’re base coated with VMC Khaki (70.988). Shaded areas were darkened with the addition of VMC German Camo Black Brown (70.822). Layers were added with a 1:1 mix of Khaki and VGC Bonewhite (72.034), followed by pure Bonewhite. Highlights were applied with a 1:1 mix of Bonewhite and VMC Ivory(70.918), and final point highlights with pure Ivory.
Gold:
A standard non-metallic metal approach was used with the following colors: VMC German Camo Black Brown (70.822), VGC Heavy Brown (72.153), VGC Heavy Goldbrown (72.151), and VMC Ivory (70.918).